OOSH team (admin)
The admin console is where the OOSH team approves boutiques and products, manages orders, returns, disputes and payouts, edits the catalogue and content, configures payments and emails, and reads reports. Menus are hidden where your role does not allow them.
Who this is for: OOSH staff: super admins, operations, finance, support and catalogue moderators.
Where to sign in: Sign in at admin.ooshfashion.com with your staff account. What you can see depends on your role.
Step 1
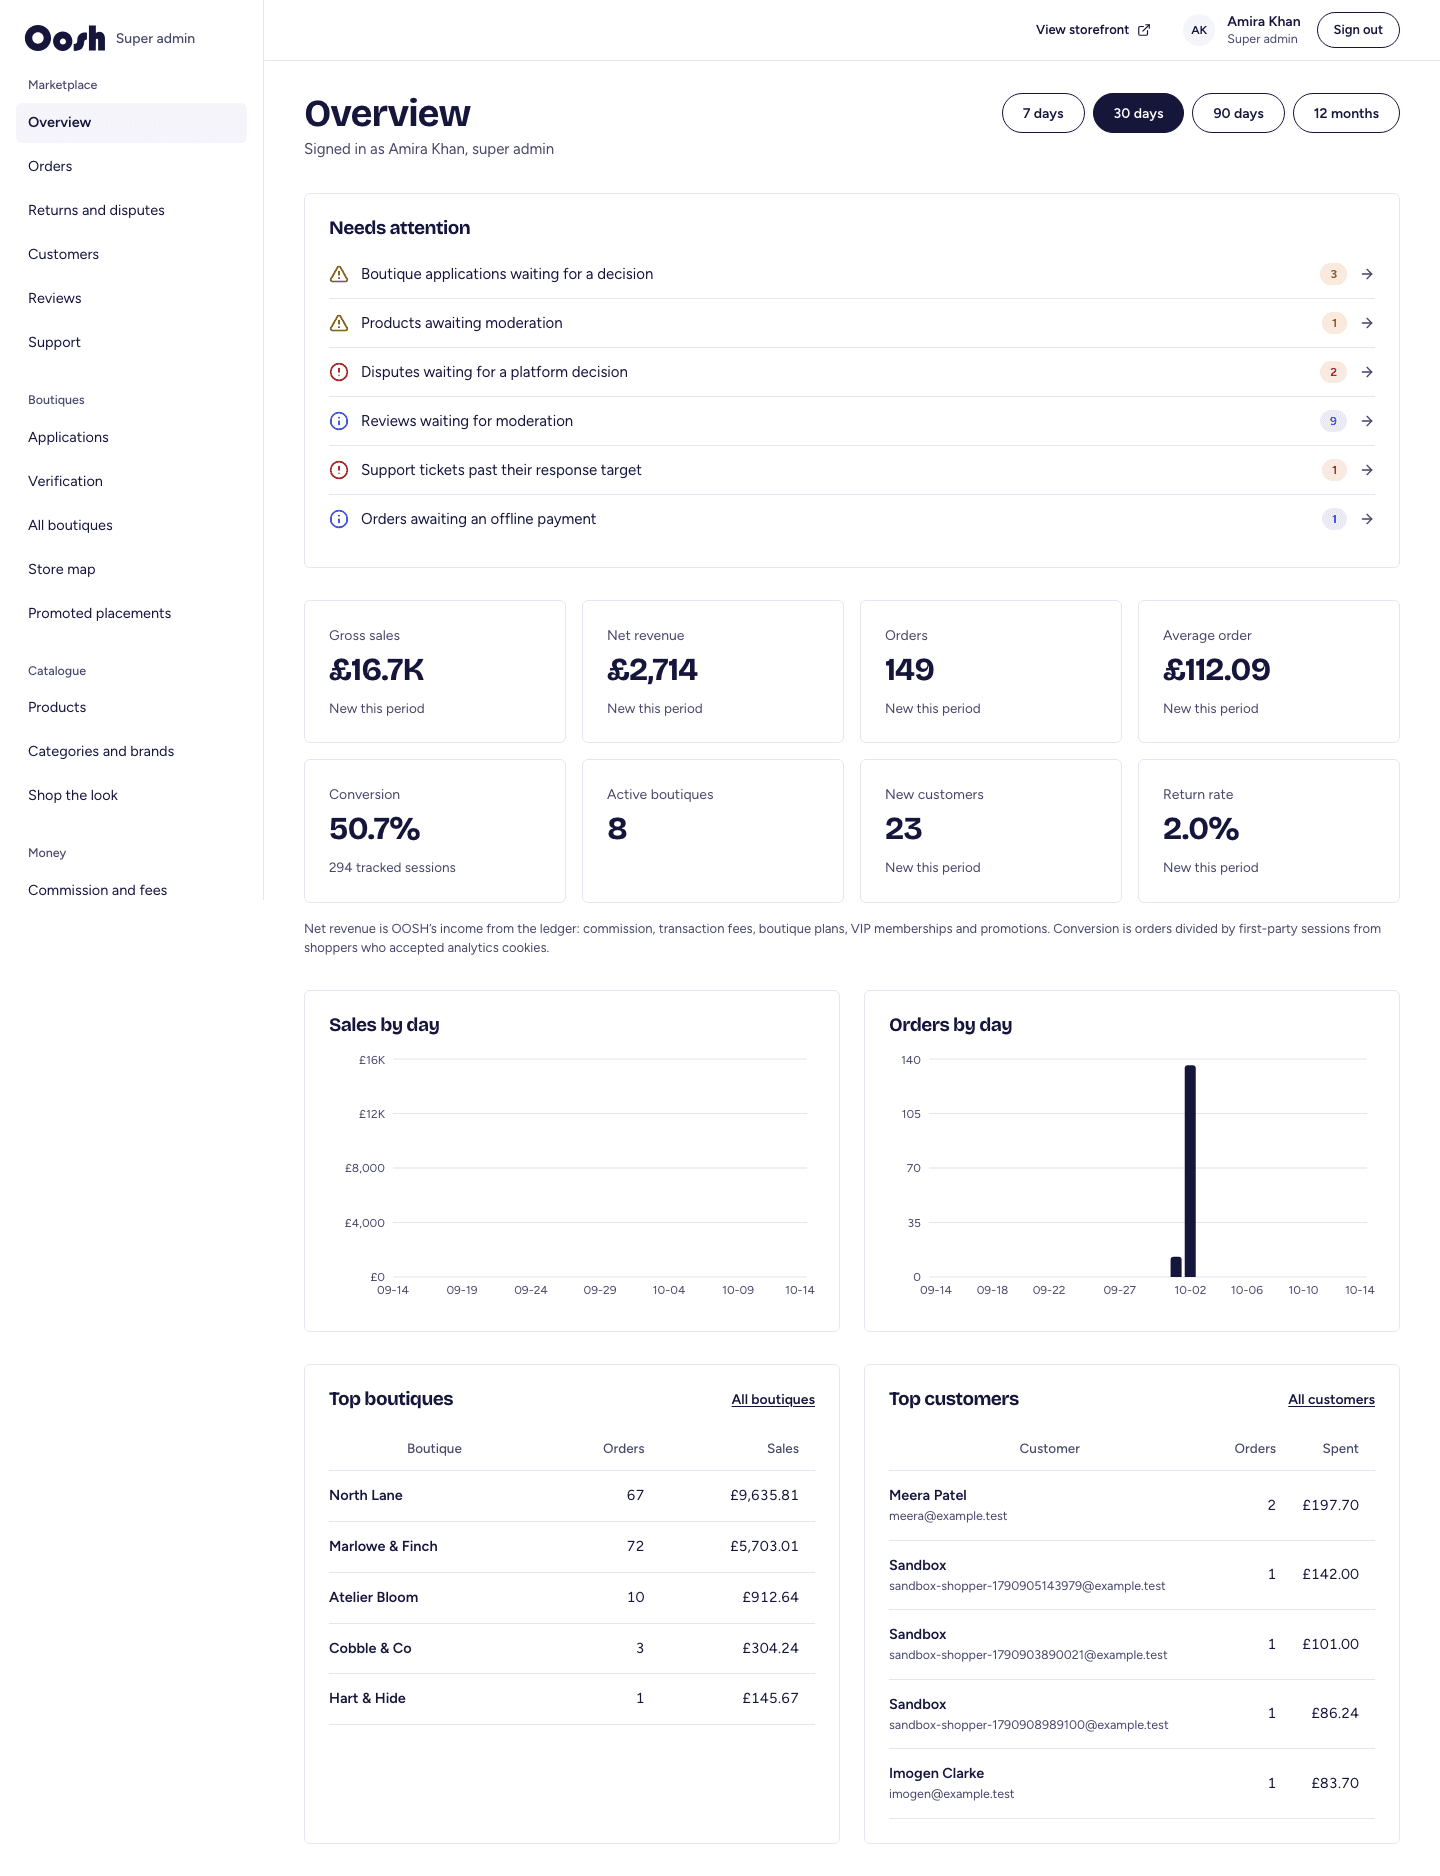
The admin dashboard
What needs attention, and the numbers at a glance.
Admin → Overview
- 1Needs attention lists what is waiting: boutique applications, products to moderate, disputes, reviews, support tickets and offline payments. Select a row to jump straight to it.
- 2The tiles show gross sales, net revenue, orders, conversion, active boutiques and more, for the period you choose (7 days to 12 months).
- 3Lower down: sales and orders by day, and your top boutiques and customers.
Step 2
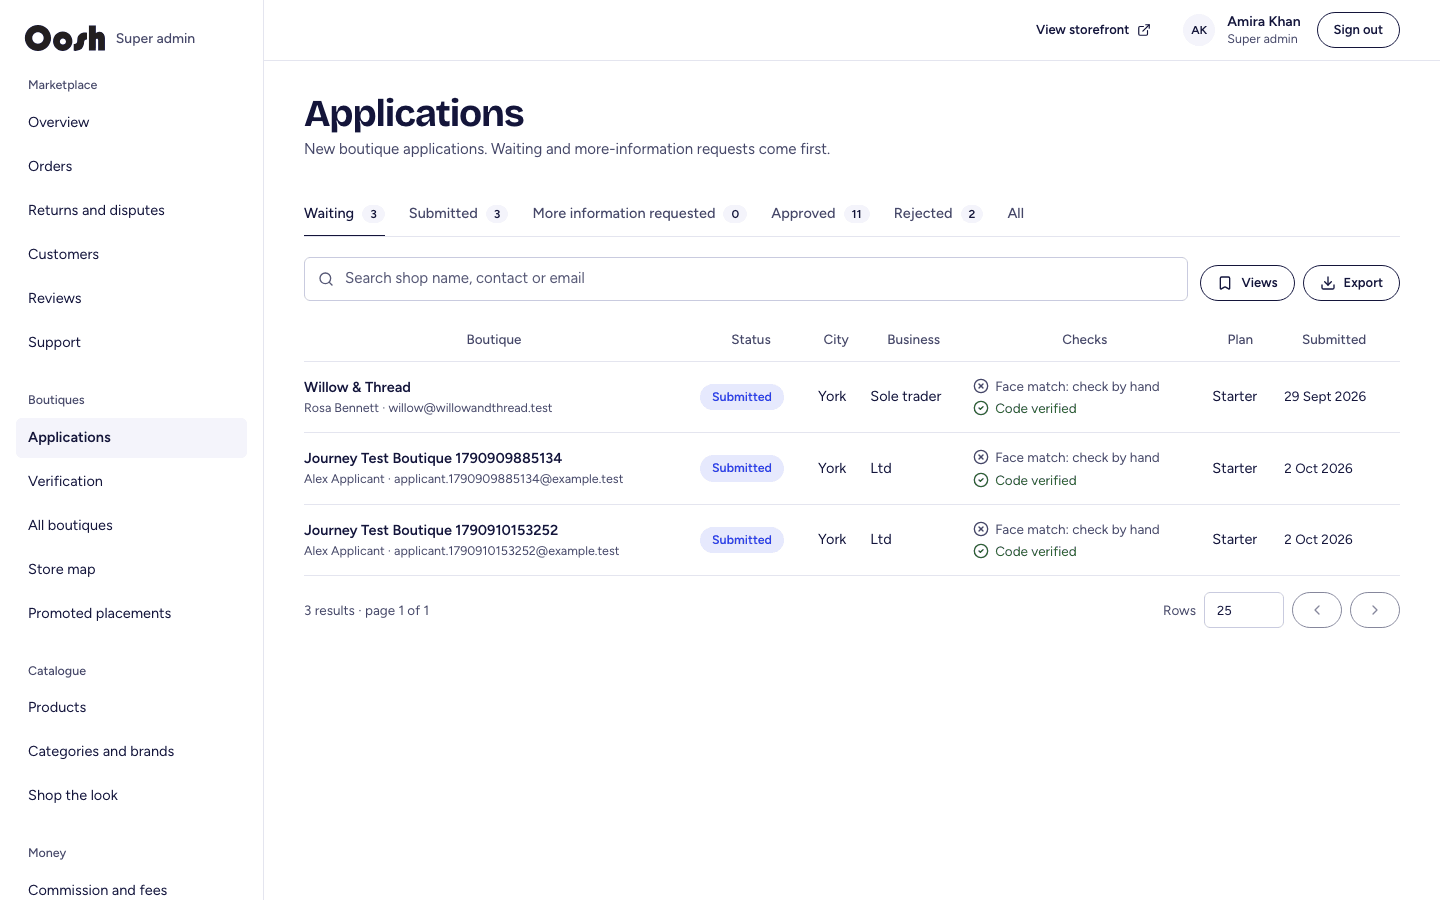
Approve boutique applications
Review, verify and approve the boutiques who apply.
Admin → Applications
- 1Open Applications to see the queue. Each shows the business details and verification results.
- 2Open one to review the photo ID and the live face-match result, add notes, and approve, reject or request more information.
- 3Approving creates the boutique and its owner account and emails them.
- 4Check identity checks in progress under Verification.
Step 3
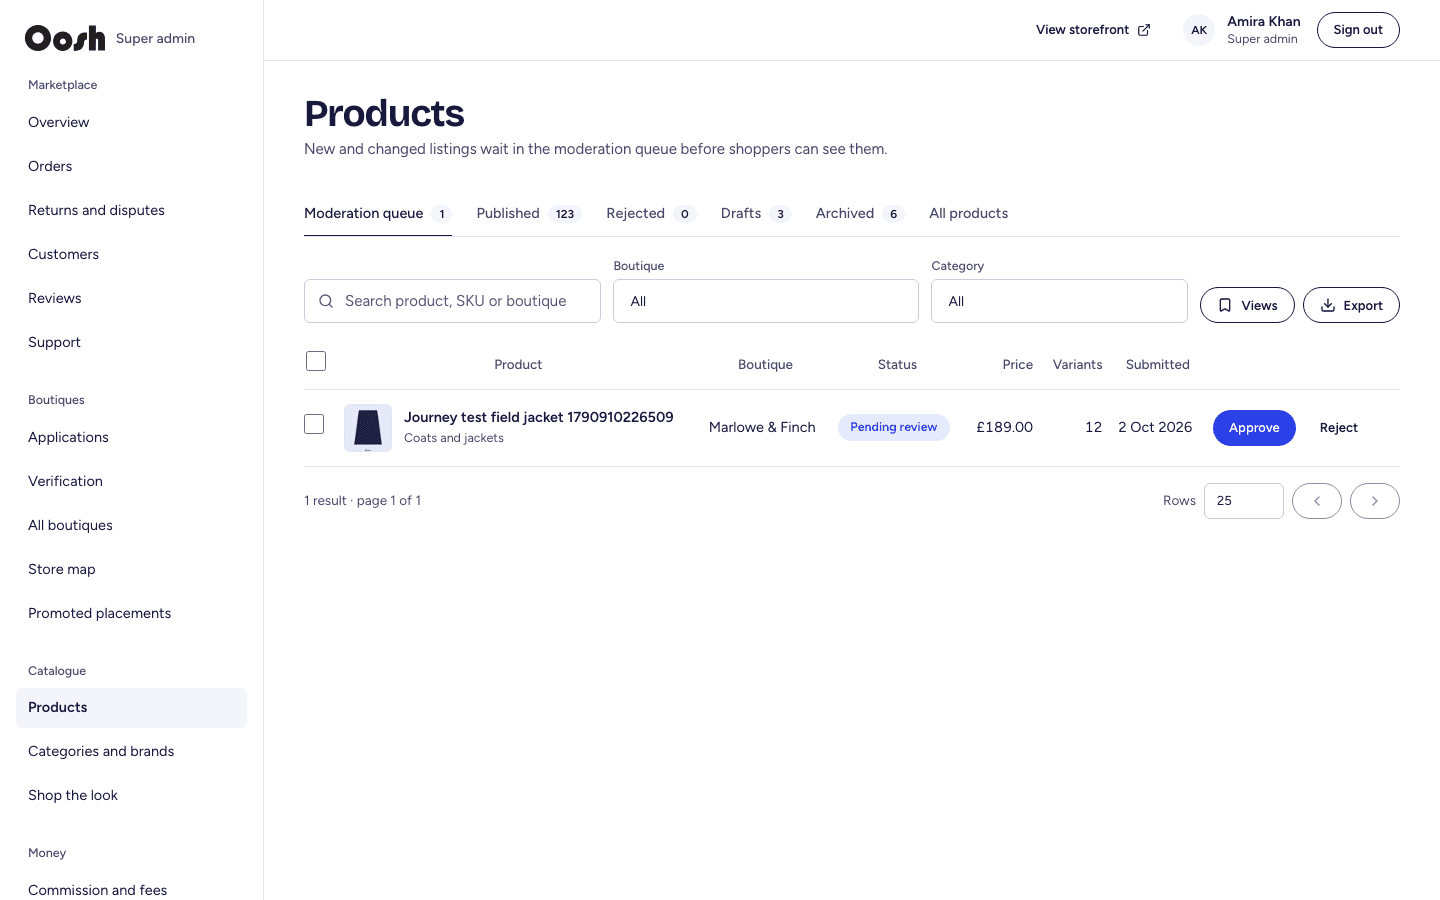
Moderate and manage products
Approve new listings, take items down, or delete them.
Admin → Products
- 1Open Products. New and changed listings wait in the moderation queue before shoppers see them.
- 2Open a product to approve it, reject it with a reason the boutique sees, or take it down if it is already live.
- 3Use Delete (or the bulk Delete selected) to remove a product permanently; its photo files are removed too. Products with orders are kept for history — take those down instead.
- 4Correct a product’s web address and search snippet with SEO on the product.
Step 4
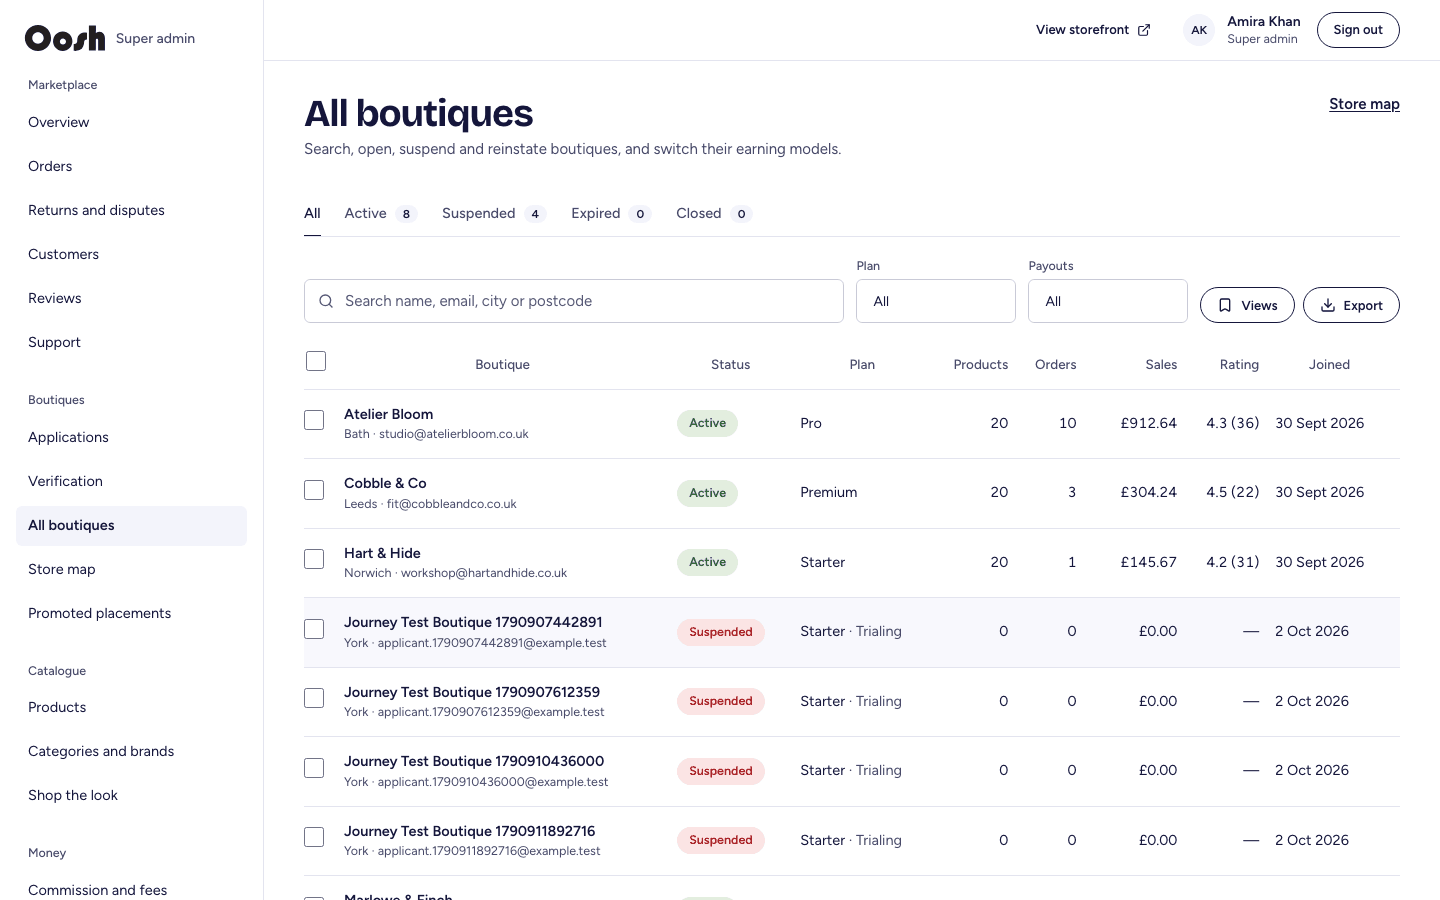
Manage boutiques
Suspend, reinstate and set earning rules per boutique.
Admin → All boutiques
- 1Open All boutiques to search and sort every shop.
- 2Open one to suspend or reinstate it — a suspended boutique’s products leave the shop immediately — set payout holds, and choose which earning models apply (commission, subscription, transaction fee).
- 3See boutique locations on the Store map.
Step 5
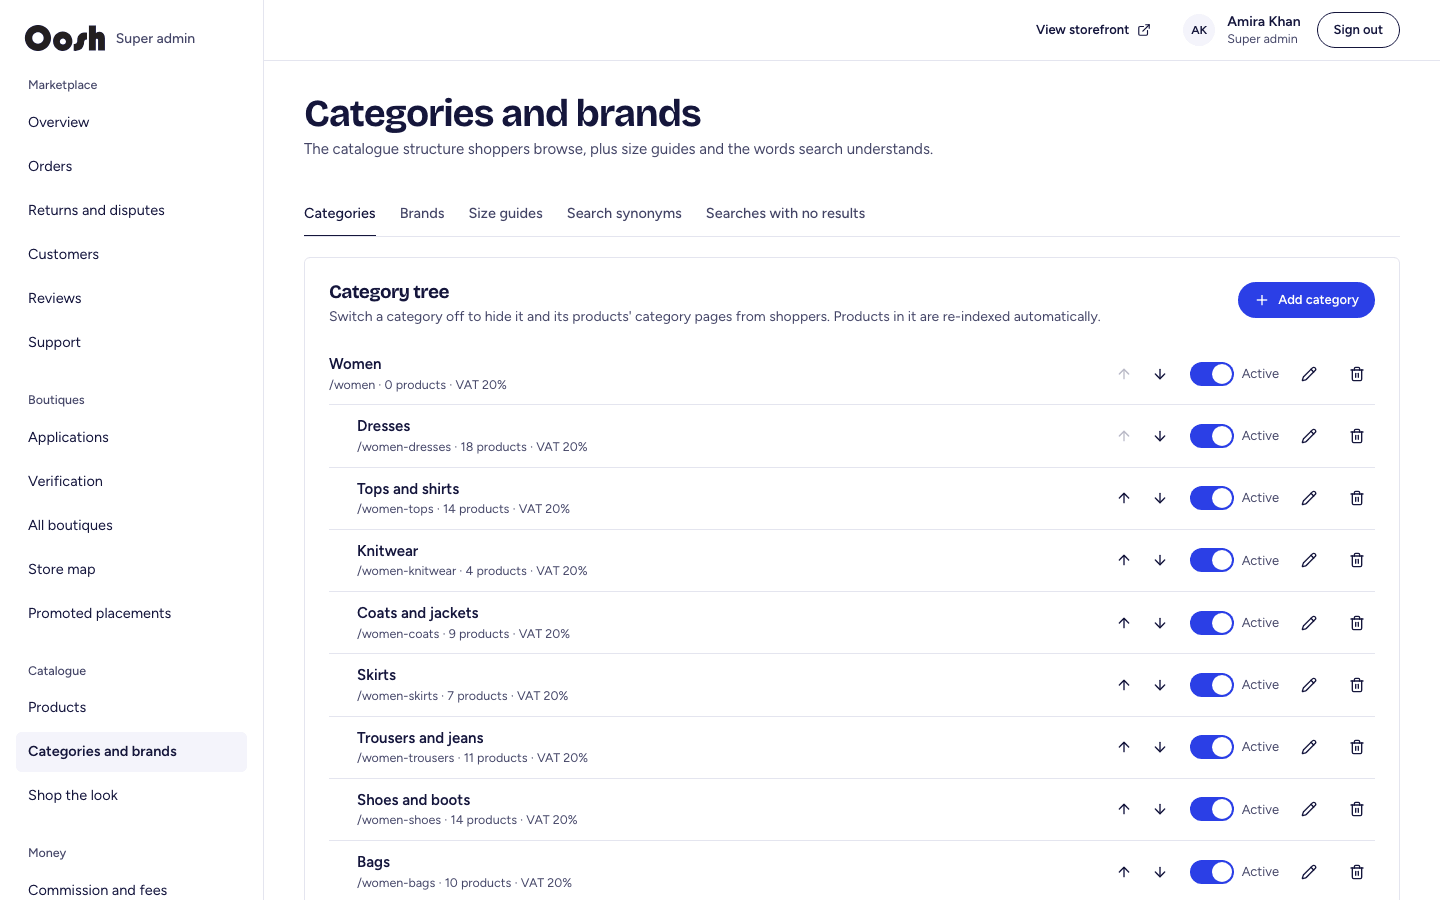
Categories, brands and content
Shape how the shop is organised and merchandised.
Admin → Categories and brands
- 1In Categories and brands, create and edit categories (with VAT rate and SEO), reorder them, and manage brands.
- 2Set categories active or inactive; changes show on the shop at once.
- 3Manage home-page banners, announcements, the blog, size guides and the “shop the look” features from the Catalogue and Content areas.
Step 6
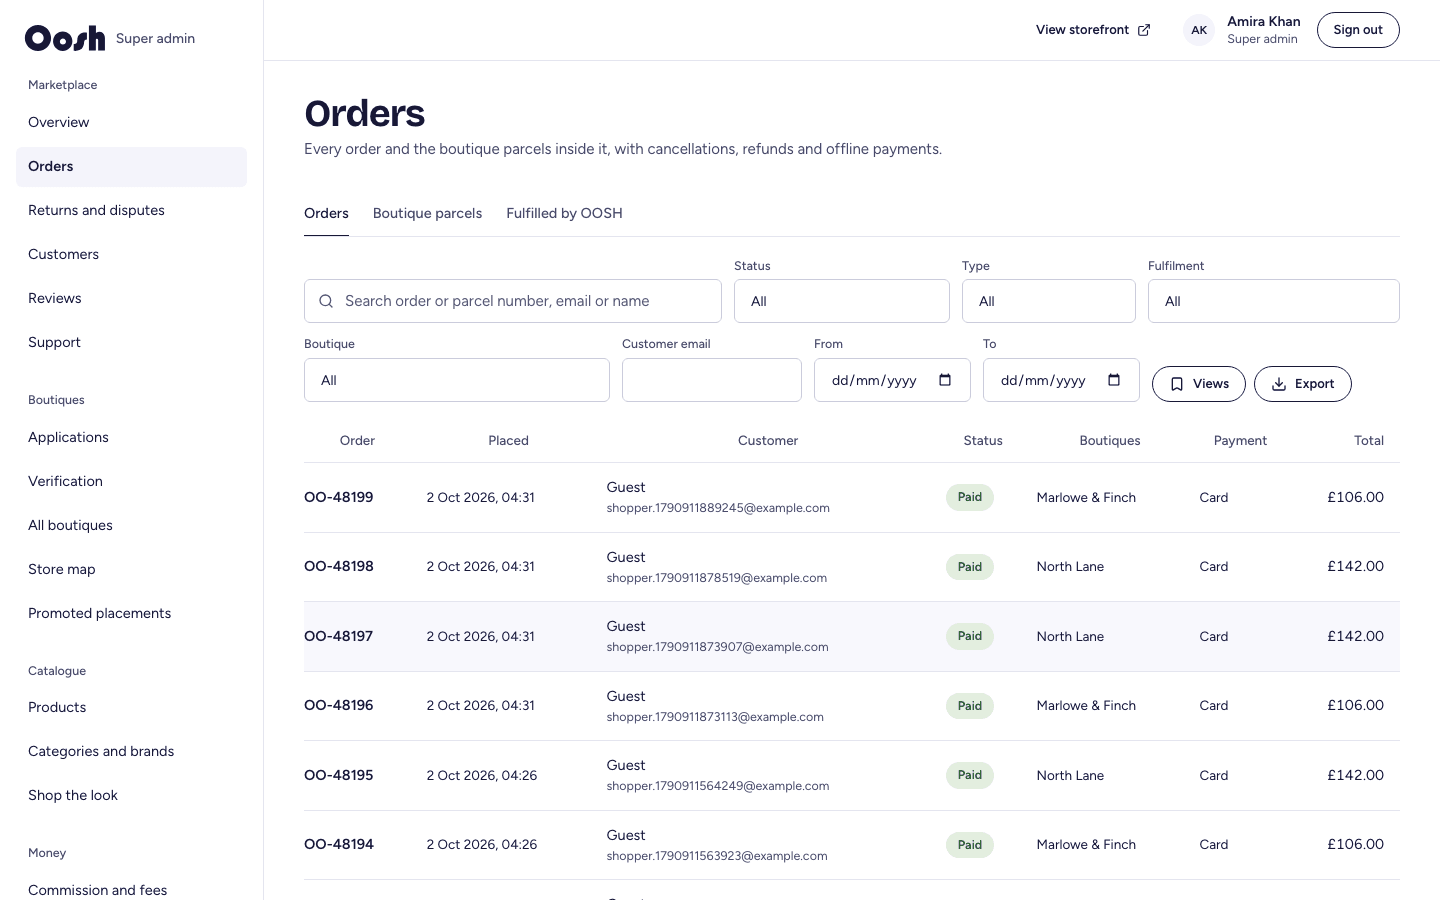
Orders, returns, disputes and payouts
The money side of the marketplace.
Admin → Orders, Returns and disputes, Payouts
- 1Open Orders to see every order across boutiques, cancel or refund, and export to Excel or CSV.
- 2Handle Returns and disputes, including chargebacks, and flag serial returners.
- 3Run payouts and set commission under Payouts and Commission and fees. Every movement of money goes through a double-entry ledger that must balance.
Step 7
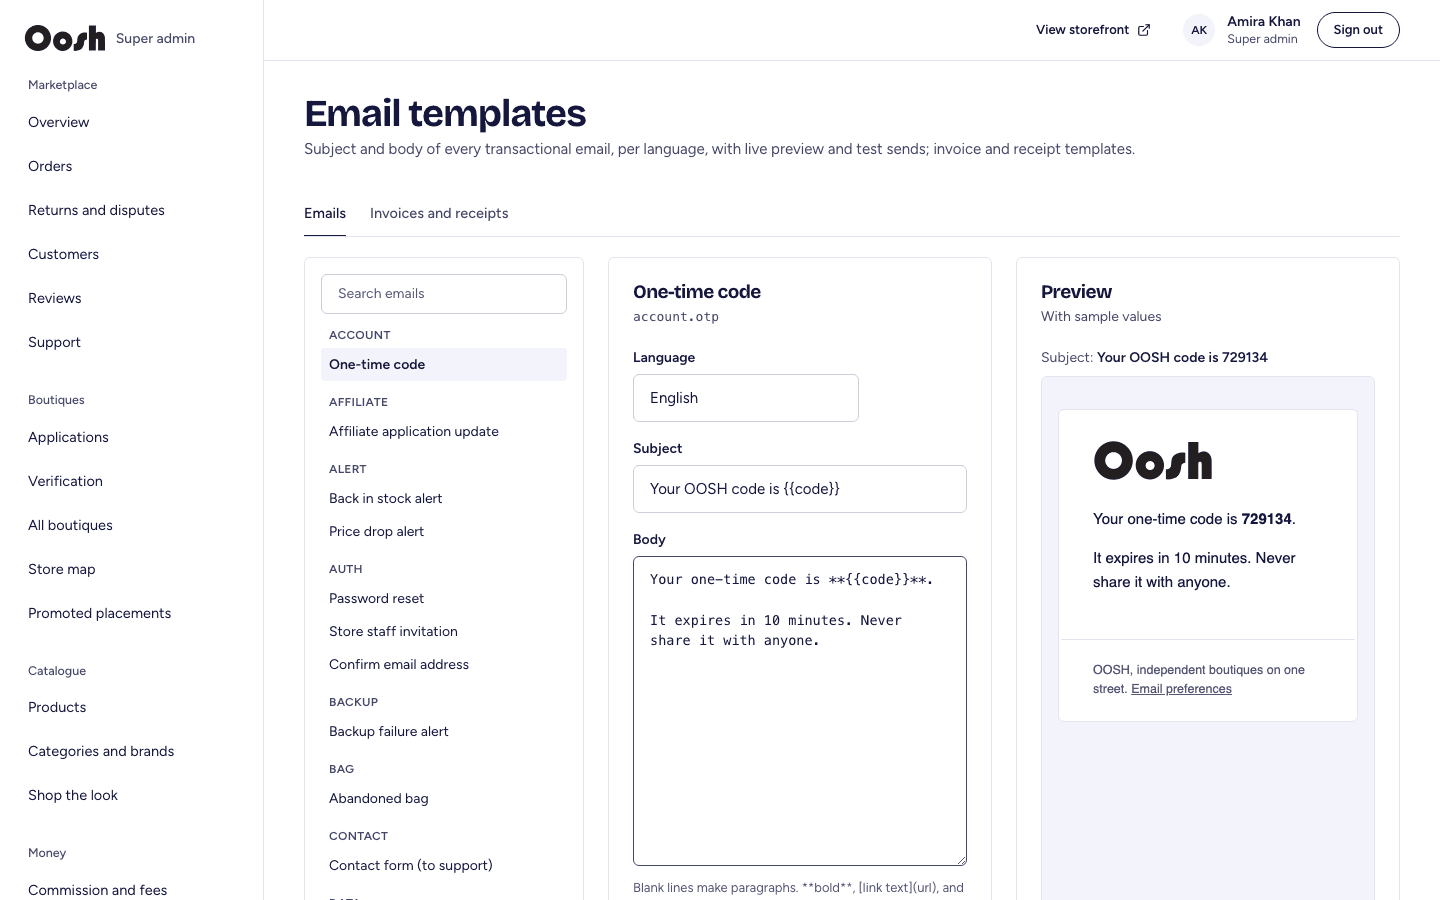
Payments and email templates
Turn payment methods on, and edit the emails OOSH sends.
Admin → Payments, Email templates
- 1In Payments, switch payment methods on or off and store the provider keys securely. Checkout only offers methods that are switched on.
- 2In Email templates, edit the wording of any email in any language. Use Send a test to receive one yourself, and Preview to see it with sample data.
- 3Edit the invoice and receipt look under Invoice templates.
Step 8
Settings, staff roles and reports
Configure the platform and control who can do what.
Admin → Settings, Roles, Reports
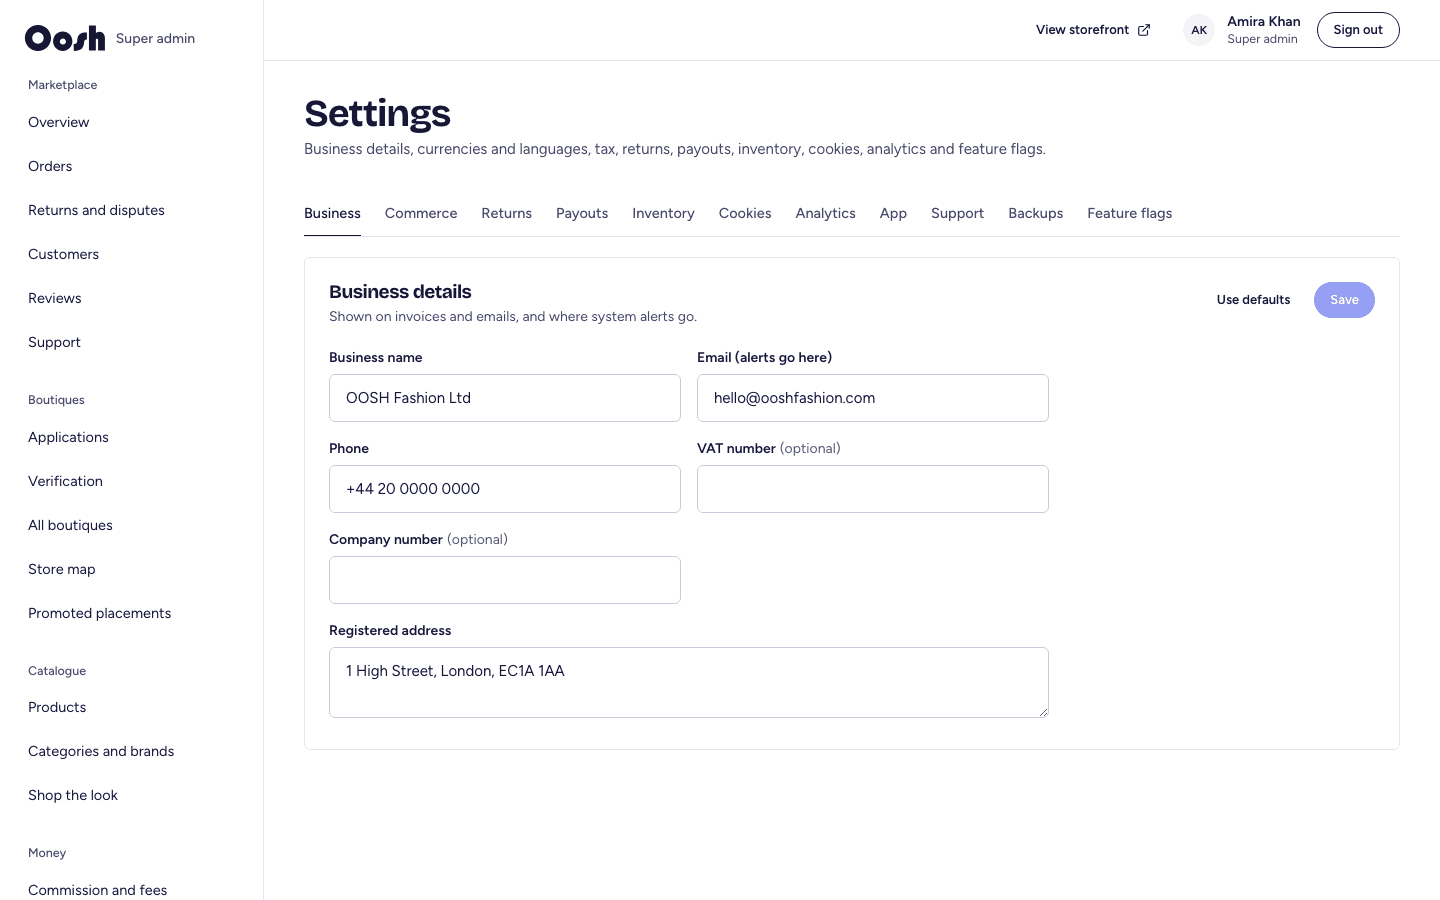
- 1In Settings, set the currencies and languages shoppers can choose, tax and checkout options, backups and analytics. Changes reach the shop immediately.
- 2In Roles, create staff roles and choose their exact permissions; grants take effect straight away and are audited.
- 3Read sales, boutique and customer performance under Reports, and the full history of who did what under the activity log.